
Beds are where your plants go. Obstacles are the things in the garden that aren't planted, like a shed, a path or a tree, so you can plan around them.
Adding a bed
Tap Add in the toolbar, pick a shape under Beds, then tap the garden where it should go.
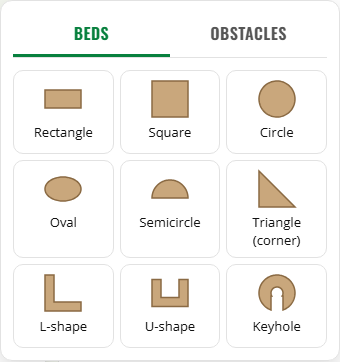
The shapes are rectangle, square, circle, oval, semicircle, corner triangle, L-shape, U-shape and keyhole. Each starts at a typical size, for example:
| Shape | Starts at |
|---|---|
| Rectangle | 4 × 8 ft |
| Square | 4 × 4 ft |
| Circle | 4 ft across |
| L-shape | 8 × 8 ft, 2 ft wide arms |
| Keyhole | 6 ft across, with a 2 ft path and a compost basket |
Moving, resizing and turning
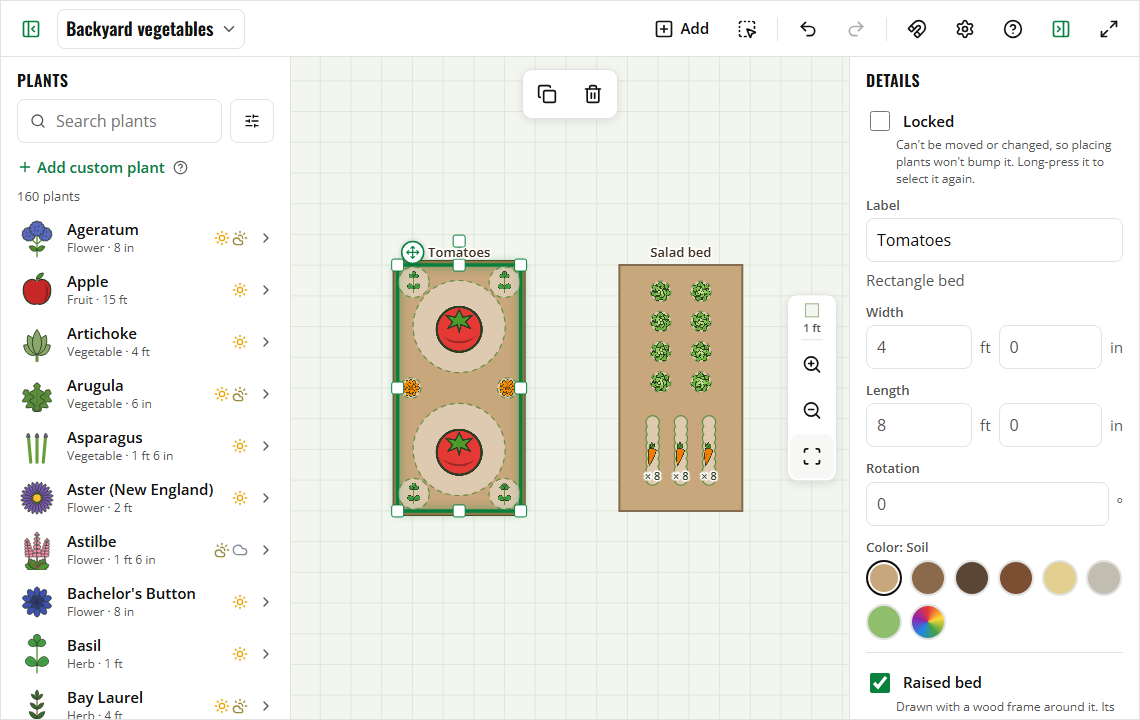
Tap a bed to select it. It gets a green outline and handles.
- Move: drag the bed.
- Resize: drag a corner or side handle.
- Turn: drag the round handle.
- Exact sizes: type them in the bed's details (width, length, arm sizes, rotation). Lengths are in feet and inches, or meters and centimeters.
- Nudge: on a computer, the arrow keys move a selected bed 1 inch (1 cm in meters), or a whole grid square with Shift. Its plants move with it.
To line beds up neatly, turn on snapping (the magnet button). See Settings and snapping.
Bed details
With a bed selected, its details have:
- Label: a name, like "Tomato bed", shown on the garden. A selected bed's label has a small grip: drag it to put the label anywhere on the bed. Double-tap the grip to put it back.
- Color: soil, dark soil, compost, mulch, straw, gravel, grass, or any color you pick.
- Raised bed: draws a wood frame around it. The size you type is the soil inside the frame.
- Divider lines: split the bed into sections. Choose how many lines go lengthwise and crosswise. They start evenly spaced; drag a line to move it, or type its distance from the edge.
- Locked: stops the bed from moving while you place plants. See Locking.
- Plants in this bed: a count of what's planted in it.
Odd-shaped beds
Real beds aren't always rectangles. To make one shape out of several, overlap two or more beds, select them all, and tap Combine. They merge into one bed outline. Separate splits it back into its shapes.
To select several at once: on a computer, hold Shift and click each one, or drag a box around them. On a phone, long-press the first one, then tap the others. The Select multiple button in the toolbar works on both.
Copying and deleting
- Duplicate copies the bed with its plants. Duplicate without plants copies just the shape.
- Delete removes it (or press Delete). You can also drag it off the garden, onto the plant list or the toolbar: it fades, "Release to delete" shows, and letting go deletes it. Undo brings it back.
Obstacles
Tap Add, then pick an obstacle: Tree, Shed, Path, Fence or Patio start at real sizes (a shed is 8 × 10 ft), or pick any of the bed shapes under Other shapes. Obstacles are drawn in gray (or a color you pick, like brick, stone or water) with their name on them, and they resize, turn and rename just like beds.
Plants can sit on an obstacle, but they're marked as not in a bed. See Warnings.
Locking beds and obstacles
Once your beds are where you want them, lock them so placing and dragging plants doesn't bump them:
- Locked in a bed's or obstacle's details locks that one.
- Lock all beds and obstacles in Settings locks them all.
A locked bed can't be moved, resized or deleted, and dragging on it pans the garden instead. You can still place and move plants in it. To unlock one, long-press it to select it, then untick Locked.
Measurements
To show each bed's edge lengths on the garden, turn on Show measurements in Settings (separately for beds and obstacles). They also show in pictures, PDFs and prints.
